
Removing the P90 Upper Receiver
At this point we've completely disasembled the LPEG P90. You should have both halves of the shell, and all of the parts set aside. Next we will need to cut off the upper receiver from both sides of the shell. Once that is done the replacement receiver can be mounted. So let's get back to work on building our Stargate SG-1 prop P90!
Before I start I will point out that it will be very helpful for you if you already have the SG1 Props replacement upper receiver on hand. This will allow you to 1: test-fit the new receiver to the body, and 2: you will be able to see clearly what it is you need to mount to the body--thus, how much of the old upper receiver you need to cut off.
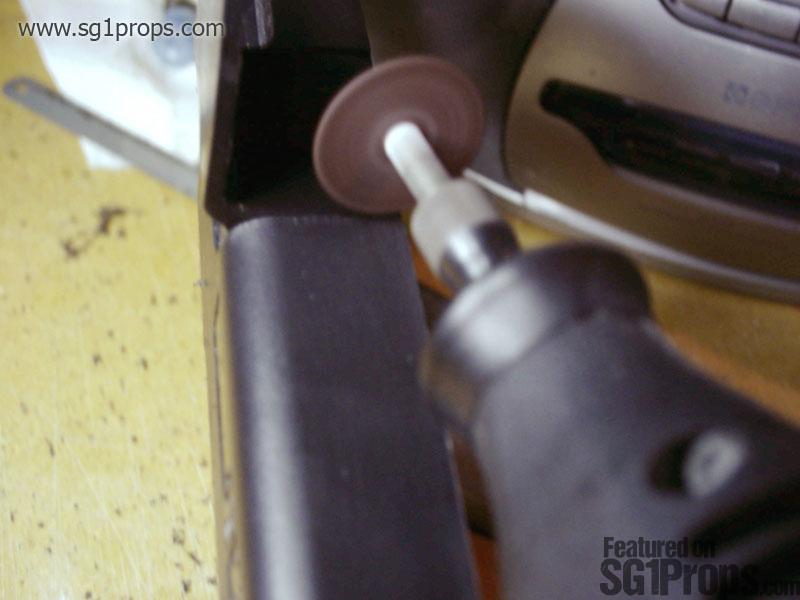
To start the modification process, get one half of the P90 and lay it on a flat surface where you can do the cutting on. Preferably you will be able to use the edge of your work table.
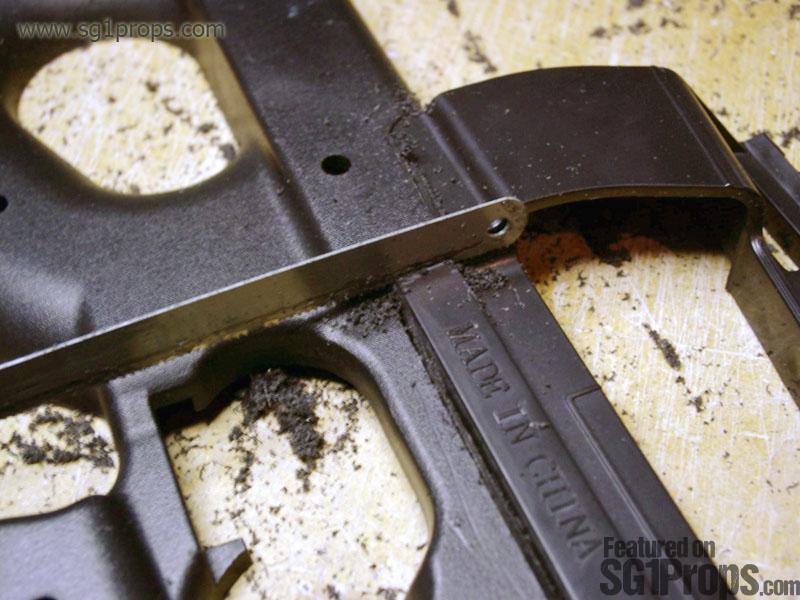
Begin your cut right below where the flash hider used to be, following the groove that goes underneith the faux cocking rail. I reccomend that this cut be made with a hacksaw that has a thin, straight blade. As you cut, do not worry about destroying the cocking rail, but try
Since it's a straight cut along the bottom of the cocking rail, this isn't very hard to do. The most complicated part of cutting off the upper receiver is when you reach the end of the cocking rail, and then have to cut upwards. This is where it's really helpful to have a Dremel type rotary tool with a cut off wheel. Again, don't worry about sacrificing the upper receiver, but try not to damage the body of the gun. if you dont have a Dremel tool than it may be helpful to cut through the upper receiver from the top, using your hacksaw to slice off the receiver in layers.
Clean Your Gun
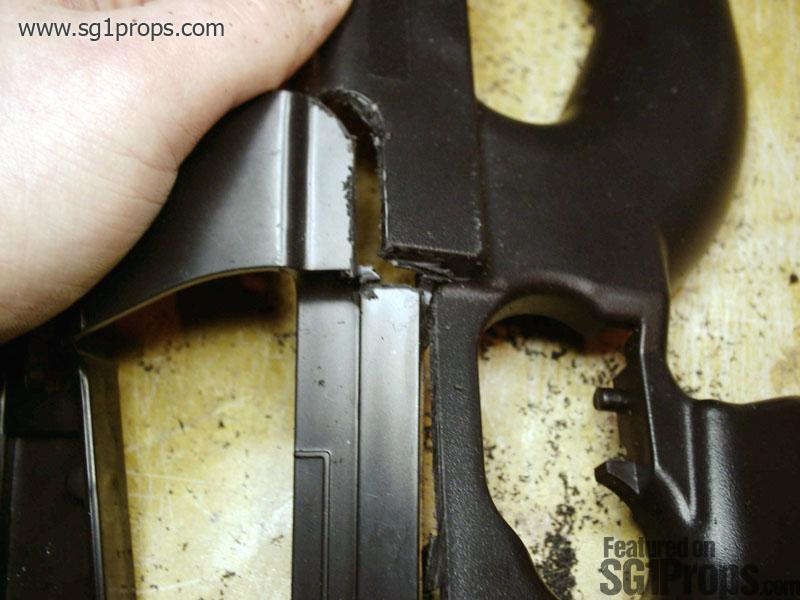
Once you've cut off the bulk of the upper receiver, remove any traces of it and the cocking rails by using your rotary tool, a metal file, and/or sandpaper. You should also try and level out the part of the gun where the cocking rails were. If you cut off too much than you may have to use some Bondo type putty to rebuild or fill in holes.
You will need to repeat all of the above steps on the other half of the gun shell. Overall, this isn't a hard process, but taking your time will insure that you get it right. The more meticulaus you are in measuring, comparing, and test fitting, the less likely you will have any problems (and the more likely you'll end up with a nice Stargate prop!).
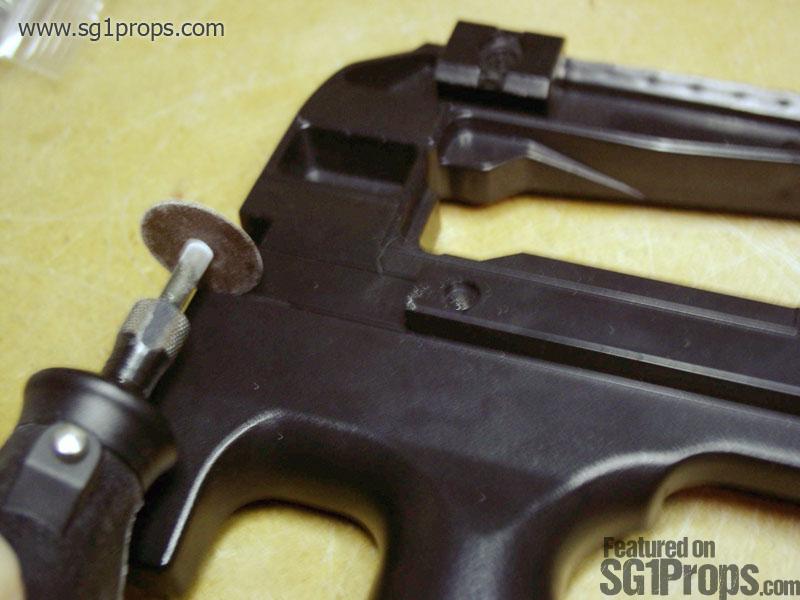
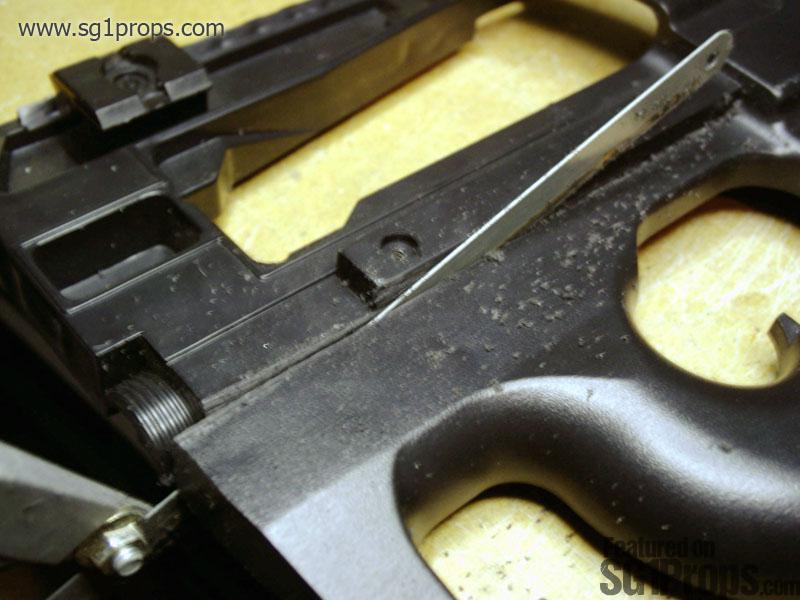
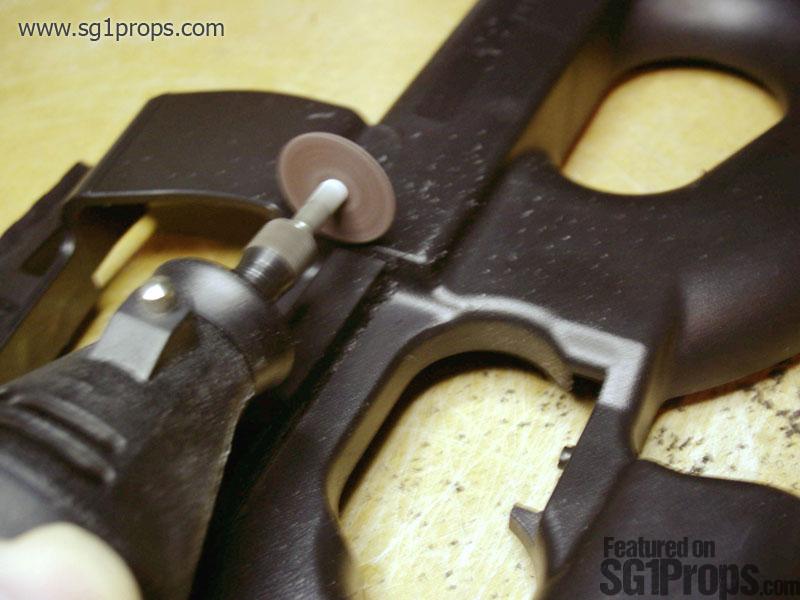
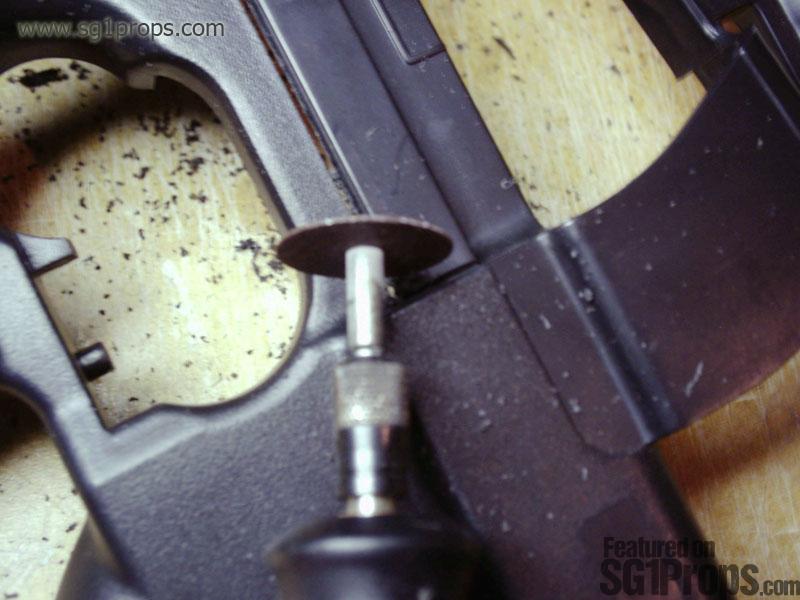
Inside the P90
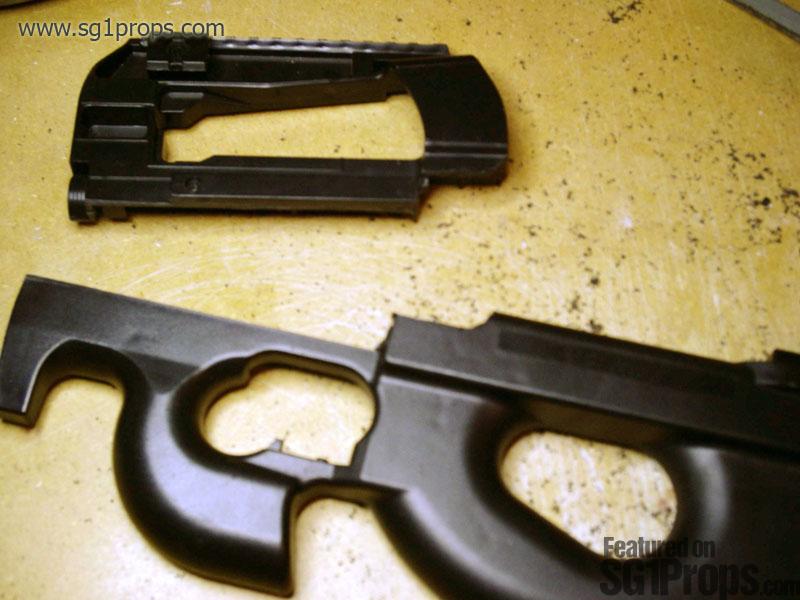
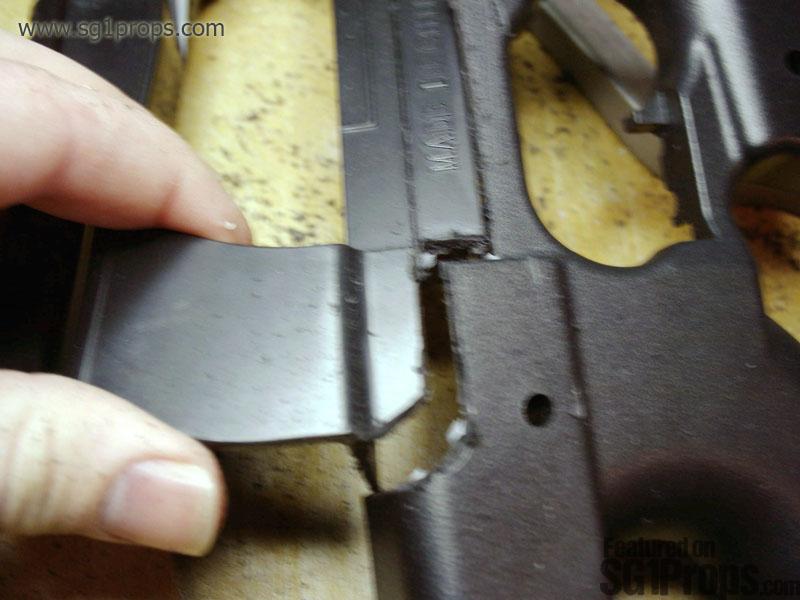
If you have the SG1 Props replacement upper receiver on hand then you can hold both halves of the P90 shell together and test fit the receiver. You will notice that there is a big problem: The tail end of the upper receiver will not fit fully into the body of the gun! It won't fit because there are several pieces of plastic inside the gun which block the receiver from sliding into place. Needless to say, they need to be cut off.
I have provided pictures showing some of what you need to cut off. The main part that needs to be cut off is the "beam" in which one of the screws (that we removed earlier) holds the two parts of the body together. Cutting this off won't terribly affect the gun's stability, but later on you can always glue the two halves together. You will also need to remove the half-moon shaped barrel support beam. In general, compare the new upper receiver to the body, and let that be the determining factor to what you should cut off. Just keep working at it until the new upper receiver slides fully onto the body.
Make room for some gas
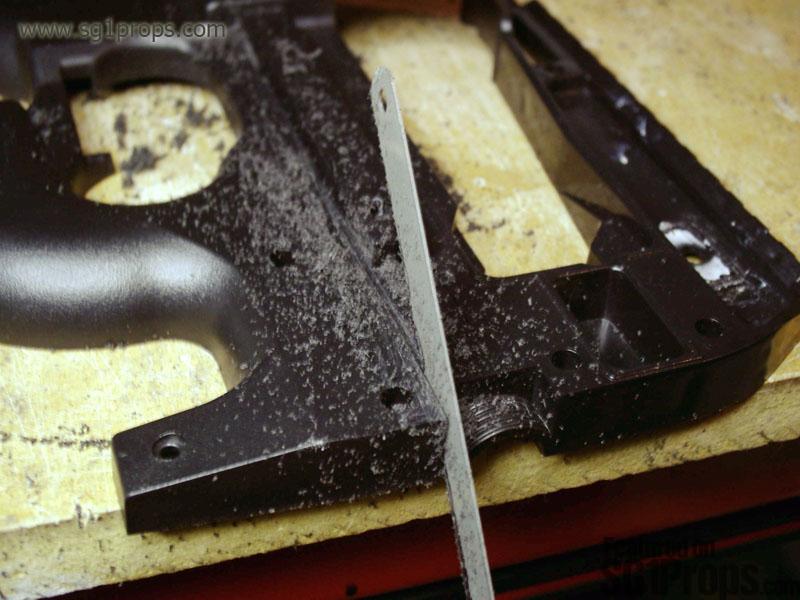
The next thing that you need to do to prepare your P90 shell is to make a cut on the front for the "gas block". On the real steel gun, this would function as a part of the weapons firing process. On the Tokyo Marui airsoft gun it's used to hold the upper receiver to the body—the SG1Props.com kit uses it for the same exact purpose.
Before cutting you should carefully measure and mark or scribe four corners to use as a guide.
A Note on Magazines
Before you put the gun back together it's important for you to deciede what type of magazine you will be using on your replica prop. If you are using the magazine that came with the LPEG P90 then you need not do anything special. However, if you plan to use a Tokyo Marui mag, then you will need to cut off the raised area at the rear of the magazine housing. You can do this when the gun is assembled, but it would be just as easy to do it now.
Read more about the different P90 magazines you can use by reading the article P90 Magazines.
The Headless P90
At this point you should have two halves of the P90, and your replacement receiver should fit comfortably on it. The next thing you have to do is reassamble it all. When putting the two halves of the body together you will need to remember to:
Reinstall the trigger system (trigger, fire selector, spring loaded pin)
Optinally replace the metal weights (include others if you want it to be heavier)
Put the rear battery door inplace between the two body sections
With all of that done it's simply a matter of placing the two halves of the body together, and replaceing all of the screws (obviously not the screws which we cut off their thread housings).
Congratulations! Your LPEG P90 body is now ready to accept the replacement receiver.
If you have any questions, or have run into a problem, visit the Stargate prop forums and post your question.
What you'll need:
LPEG P90/D90 airsoft gun (CYMA/Well/V8)
Thin flat and phillips head screwdrivers
Hacksaw and/or a rotary tool (such as the Dremel)
Bag or box to place parts into
SG1Props.com recommends the use of proper eye protection and respirator/dust mask equipment whenever working on props.
Eye protection:
Lenses should be made from polycarbonate to protect from flying debris.
Respirator:
Completely cover mouth and nose, and fit the form of your face. A mask with interchangeable P100 particulate filters is recommended for this project.
Photos
Print | Share | Comment