
Starting out
As with most projects, start by organizing a clear work space. You should ideally have enough space to lay out the airsoft rifle, and to keep your tools within easy reach. This project will involve a moderate level of cutting/sanding, so you should expect plastic shavings and or dust.
The first step is to remove the cocking handles from each side of the airsoft gun. These are held on with phillips head screws. Remove both cocking handles and discard (we won't be reusing them).
Carry on
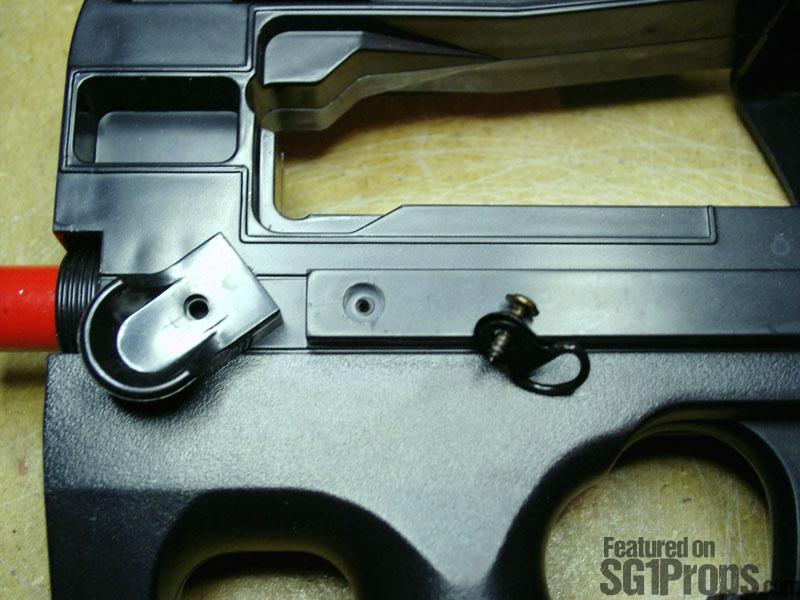
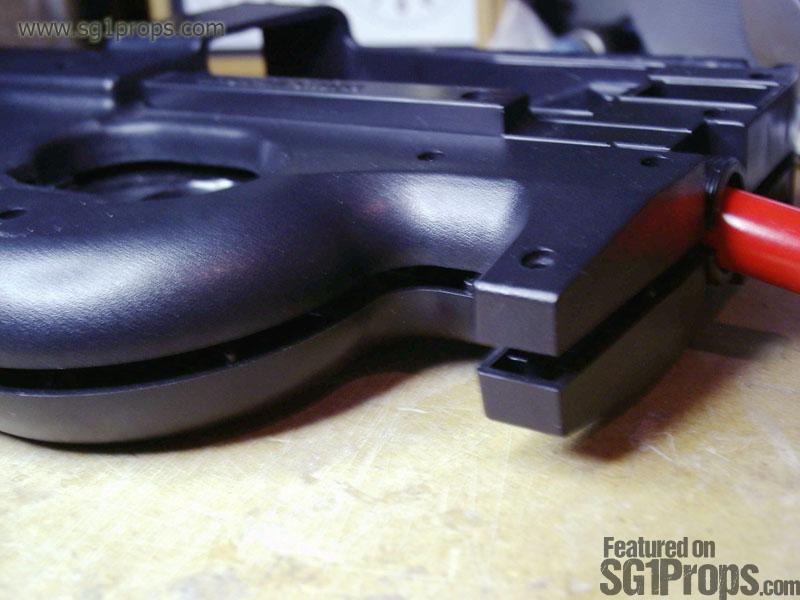
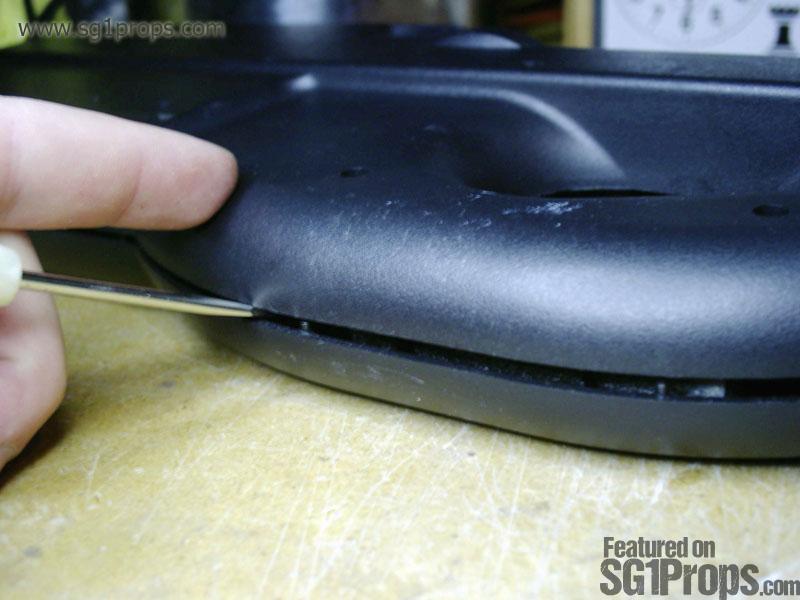
The next part that needs to be removed is the magazine release on the top of the gun body. This is a "u" shaped piece that is located at the rear of where the magazine sits. To remove the part, insert a flat-head screwdriver under the piece from the side and gently lift. Do this to each side, and the piece will move forward. WARNING: this piece is spring loaded. Be careful not to lose the small spring located behind the piece. Once removed, place the part into the bag or box that you will be storing parts in. We will be reusing this part, so save it and the spring.
Breaking it all down
Once the mag catch is removed we can focus on taking the gun apart. The P90 is made in two halves that are secured together by screws. The screws are accessible from the right hand side of the gun. There are approximately 16 screws that you will need to remove. It is easy to miss the one holding the right-side rail on, but you will need to remove it as well (the rail will then come off as well).
Once all of the screws have been removed, the next step is to begin splitting the gun body in half along the seam line. Ensure that the gun is laid out on its left hand side. For this, use your flat-head screwdriver to gently pry the gun apart. Use soft pressure, and work your way around the entire gun before attempting to lift off the right half. If you can't separate the gun, or if there is resistance in one area, then go back and check to make sure that you removed all of the screws.
Split the difference
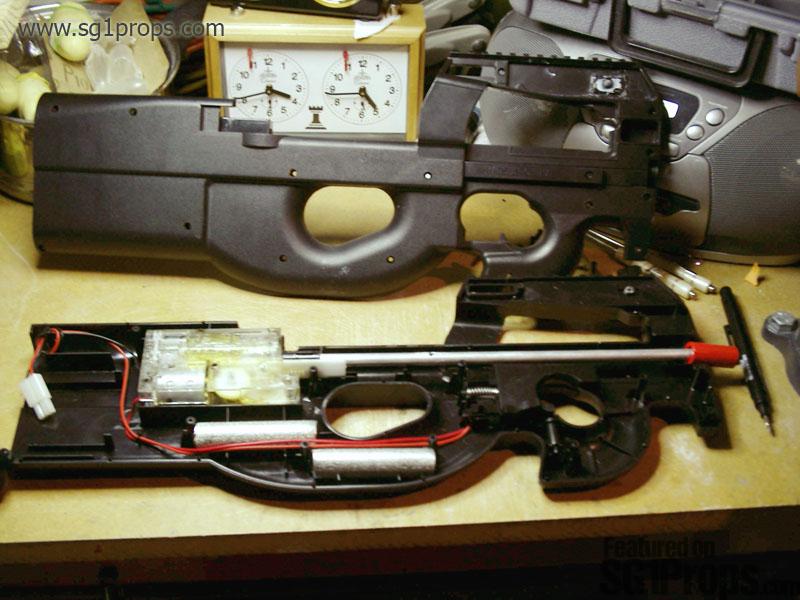
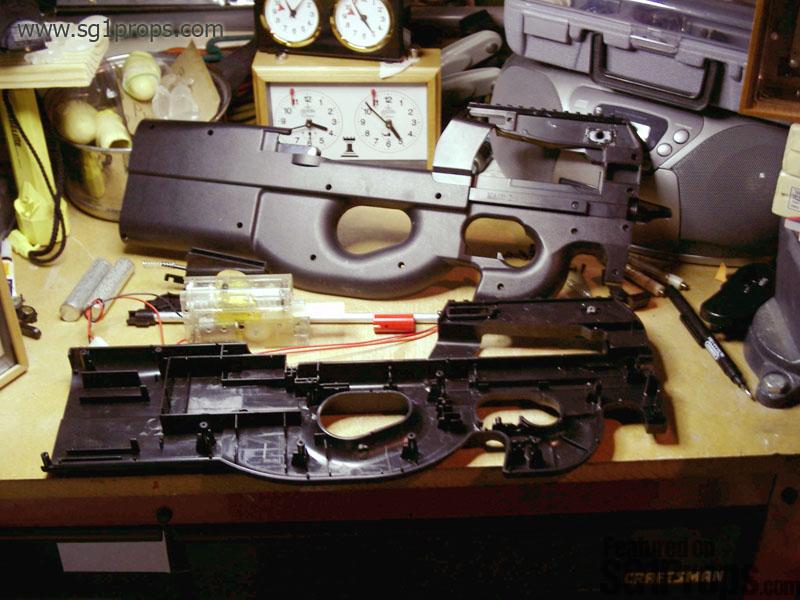
You will now be able to lift off the right side shell of the gun. Lift it off carefully so that no small parts are lost. Once you have lifted the right half, inspect the inside to insure there are no parts attached. All internal parts are normally located on the left half of the gun body, but it's safe to check so that you don't lose anything by mistake.
Once inspected, place the right half of the gun shell somewhere safe.
Gut the internals
The last step in disassembling the gun is to remove all of the internal components. Start by removing these components:
- Flash hider (discard)
- Silver inner barrel (discard)
- Battery compartment door at butt of gun (save)
- Two metal weights inside of gun (save)
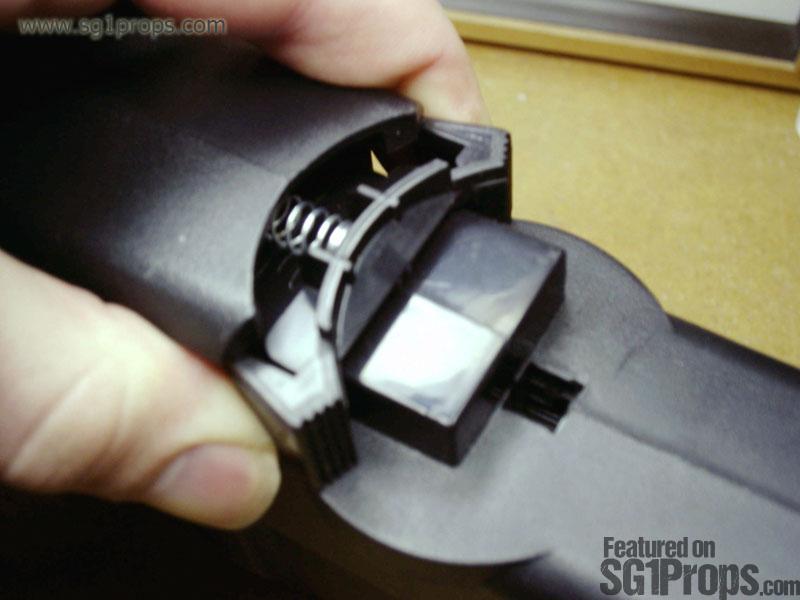
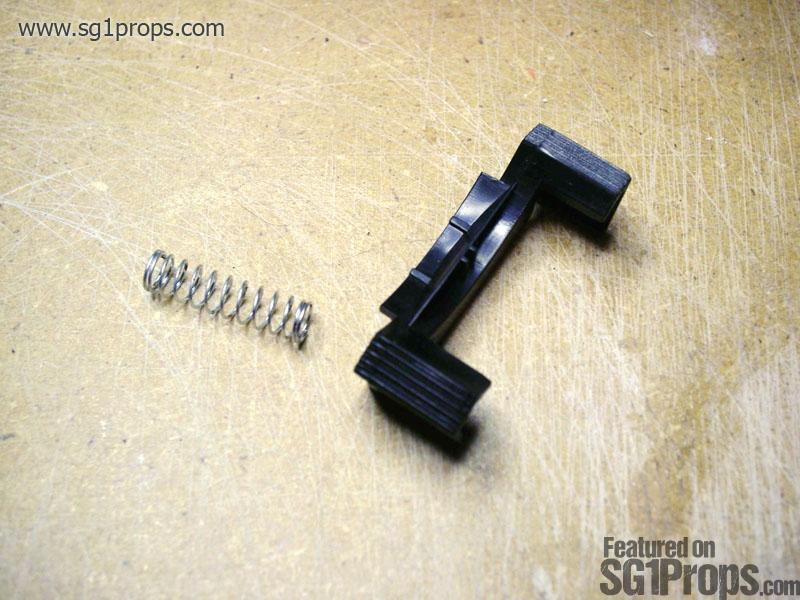
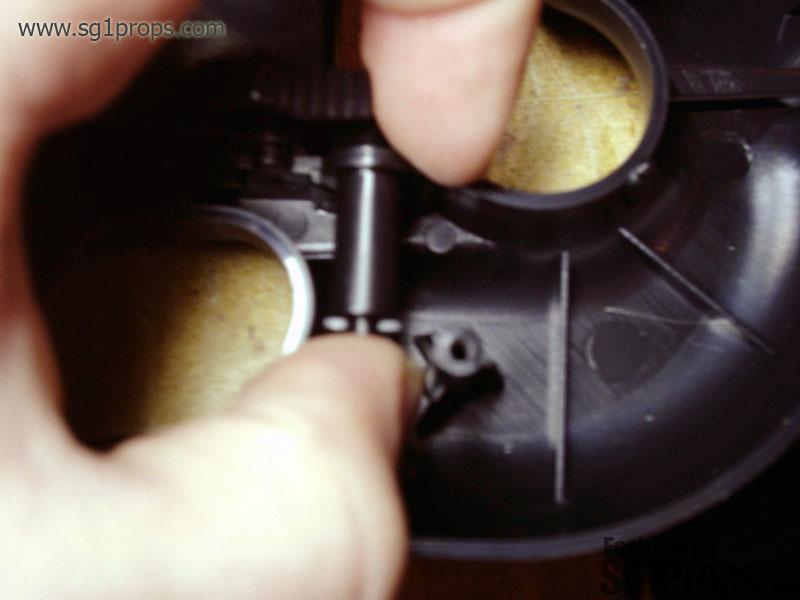
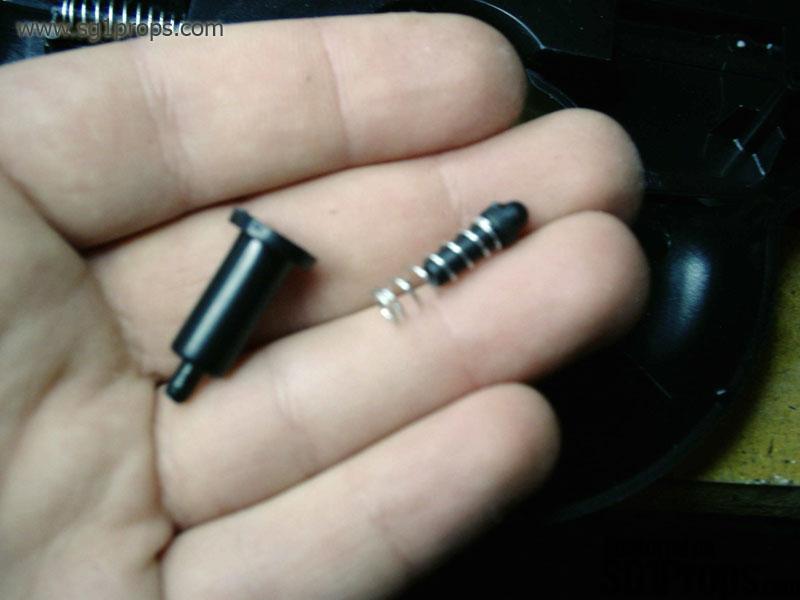
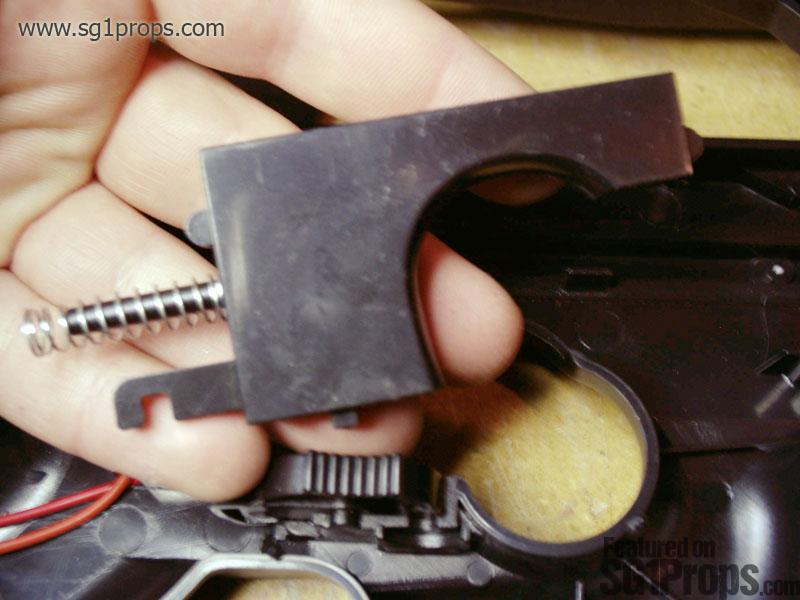
Now it's time to remove the trigger and safety assembly. Later, we will be reinstalling it in the same exact way--so observe how it is installed! Start the removal process by carefully taking out the pin below the safety (on/off) switch. This pin has a spring inside of it, so grasp it securely with a finger at the top and bottom. Now you can remove the trigger. Again, be careful not to lose the spring. The safety switch will now come out as well.
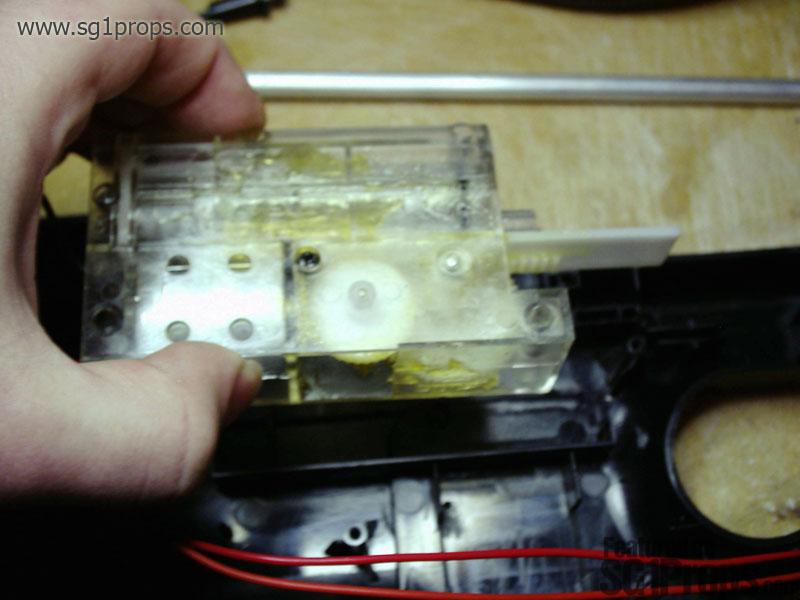
Finally, remove the electronic switch that used to be attached to the trigger. Once removed, you will now be able to lift the gearbox out of the gun. We will not need to reinstall it, so either discard it or save it for another project.
For availability of the P90 upper receiver kit, please e-mail [email protected]
What you'll need:
LPEG P90/D90 airsoft gun (CYMA/Well/V8)
Thin flat and phillips head screwdrivers
Hacksaw and/or a rotary tool (such as the Dremel)
Bag or box to place parts into
SG1Props.com recommends the use of proper eye protection and respirator/dust mask equipment whenever working on props.
Eye protection:
Lenses should be made from polycarbonate to protect from flying debris.
Respirator:
Completely cover mouth and nose, and fit the form of your face. A mask with interchangeable P100 particulate filters is recommended for this project.
Photos
Print | Share | Comment