- Thu May 22, 2014 5:08 am
#2582
Hey guys, after posing the question in another thread here I decided to see if it was indeed possible to modify a well d90h to to accept & use a Tokyo Marui med-cap hop-up mag. On the other thread i had a couple folks ask me to post a tutorial of what I did. So here it is (this will be my first tutorial so bare with me & if you have any questions please feel free to ask)
...& away we go...
Parts list:
- Wellfire p90 (either model)
- Papermate ball point pen (or one that has a tapered end)
- 1x1 slanted Lego roof piece
- Scrap piece of 1/8in thick piece of plastic (I recomend ABS as it's much stronger than Sintra)
- Devcon Plastic Welder (make sure to use this stuff in a WELL ventilated area...or it will melt your brain)
- Medium Phillips screwdriver
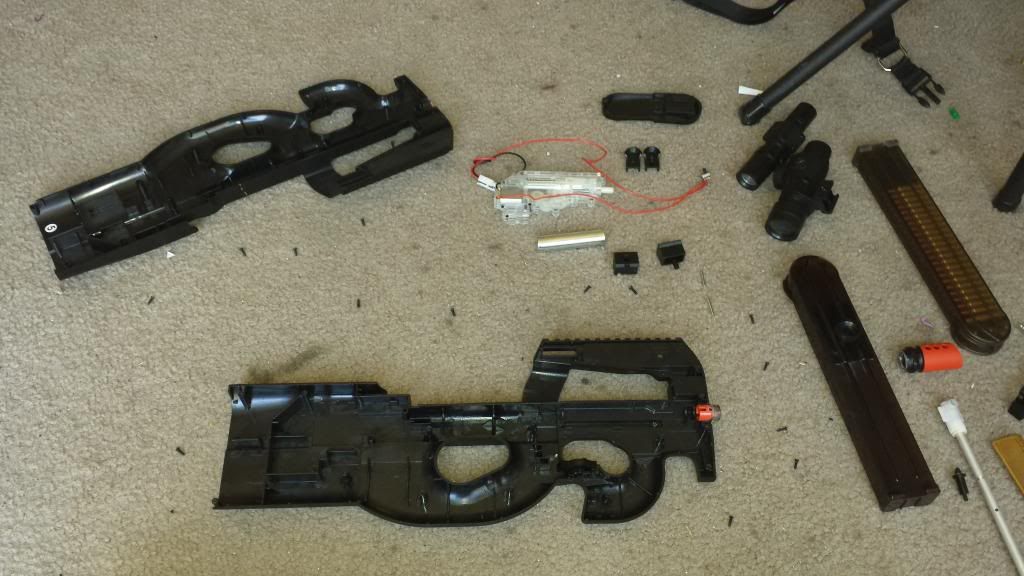
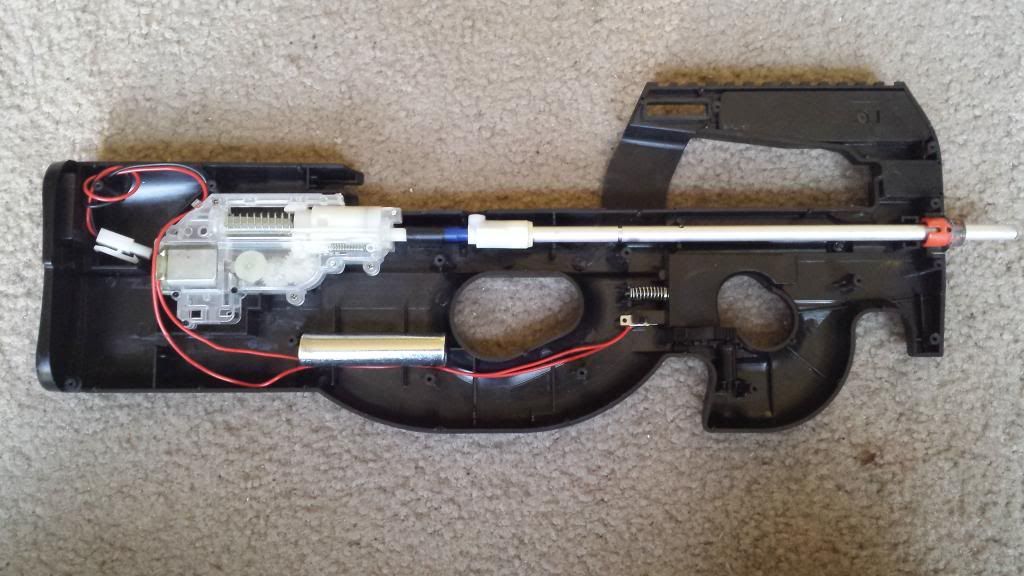
The first thing I did was to open the gun to make it easier to cut the mag block off the gun (the part that sits back by the magazine catch) & to make a hole for the TM mags feed tube to sit in (did this part by using the tutorial found on this site). Unfortunately, cutting off the mag block leaves the gear box exposed, but once the mods are done the mag covers the open area so you won't see the hole.
-Gun open with mag block cut off & new feed tube hole cut
In order for the mag to seat on the gun properly you're going to have to cut a small part of the gearbox's frame off (don't worry this doesn't affect function). Even with the piece of the gearbox frame cut off, the gearbox itself sticks up above the hole you made but it isn't very much & all you need to do is grind a portion of the mag's lip down flush (a 1/2in wide section oughta do it).
Still with me? Good, on we go...
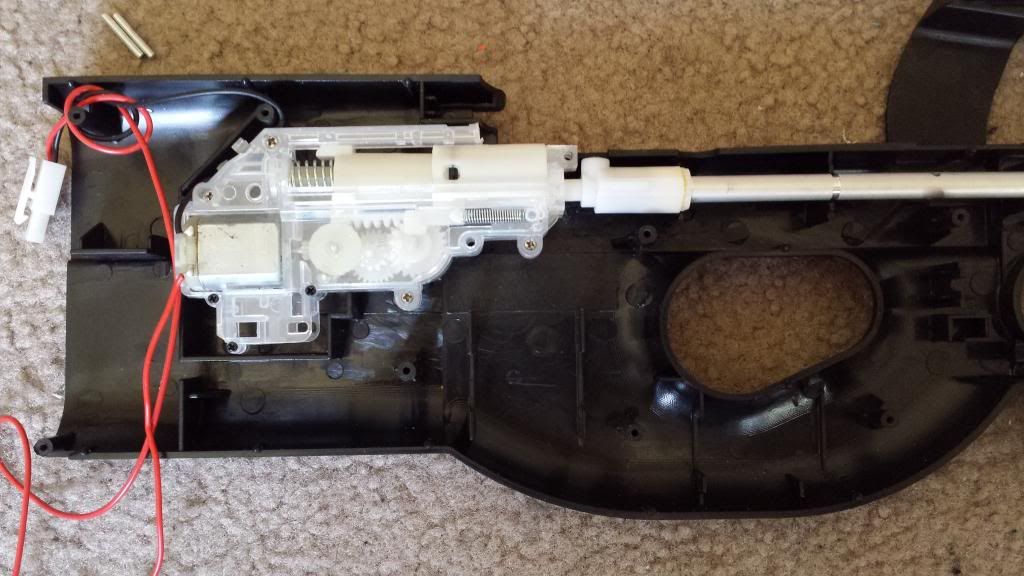
With the new feed tube hole cut I had to relocate the barrel slightly forward of it's original postion (seen below)
- Original postion
- New position
As you can see, there was now a gap between the end of the barrel & the gearbox (no bueno). I now had to figure out how to fill that gap, after trying a couple diameters of tubing I had laying around the house I decided to try a simple papermate pen...
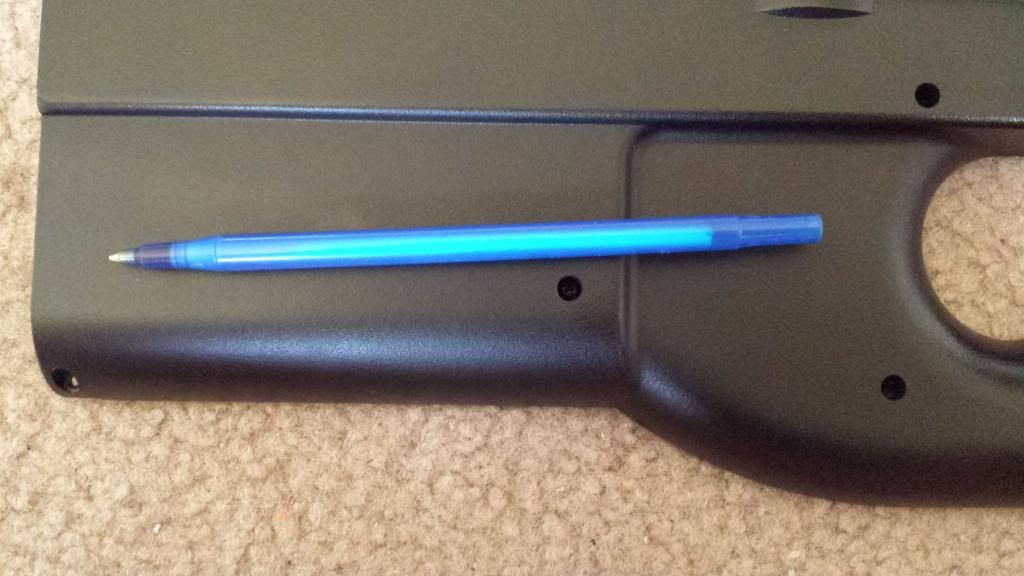
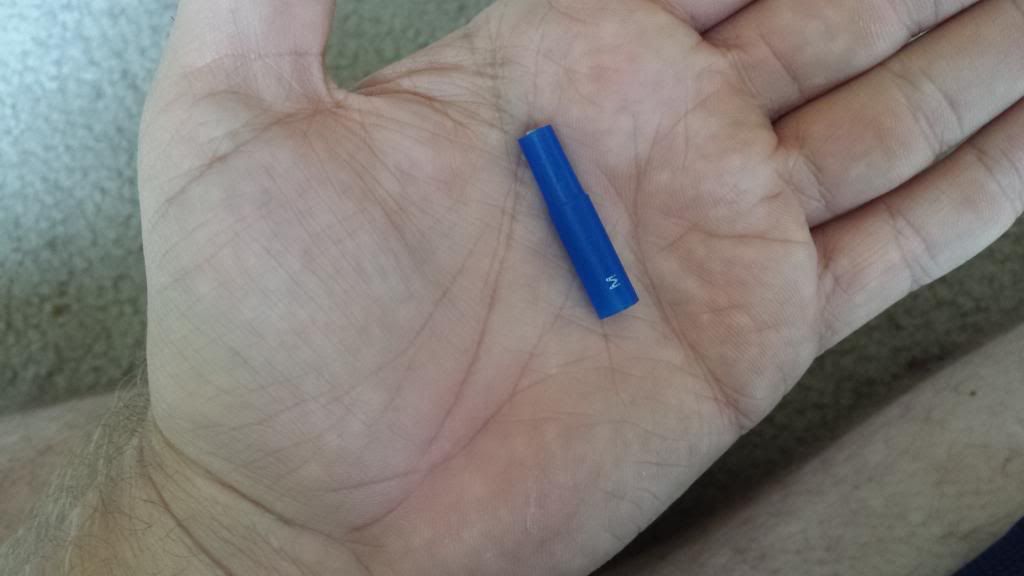
I cut a small piece off the bottom end of the pen where it tapers down smaller than the rest of the body of the pen & snipped off the end so I now had a tube that air would travel thru easily
I then grafted the piece of pen to the gearbox like so...
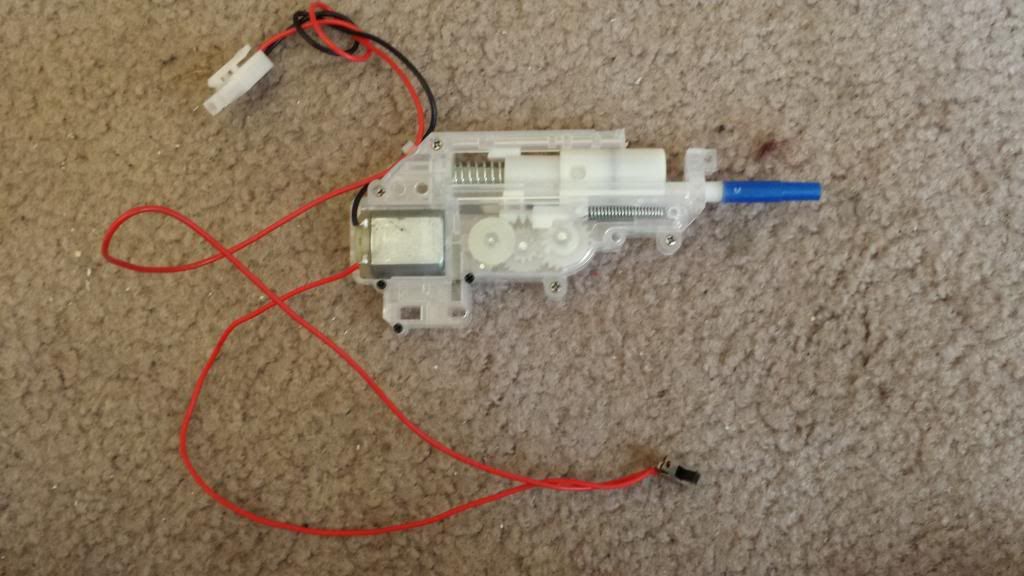
*note* in this picture you can see where the small bit of gearbox frame was cut off from the top right-hand corner of the frame.
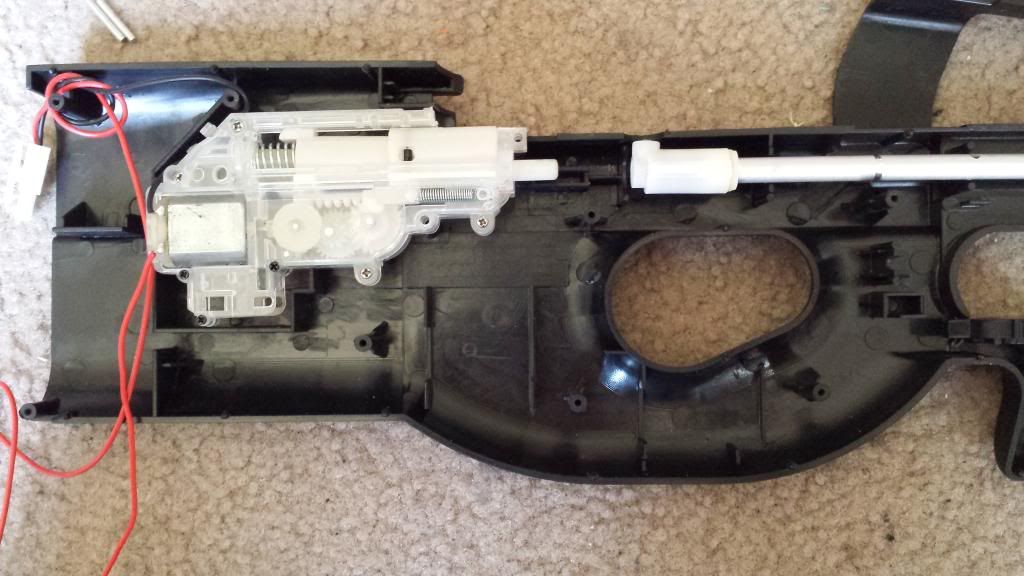
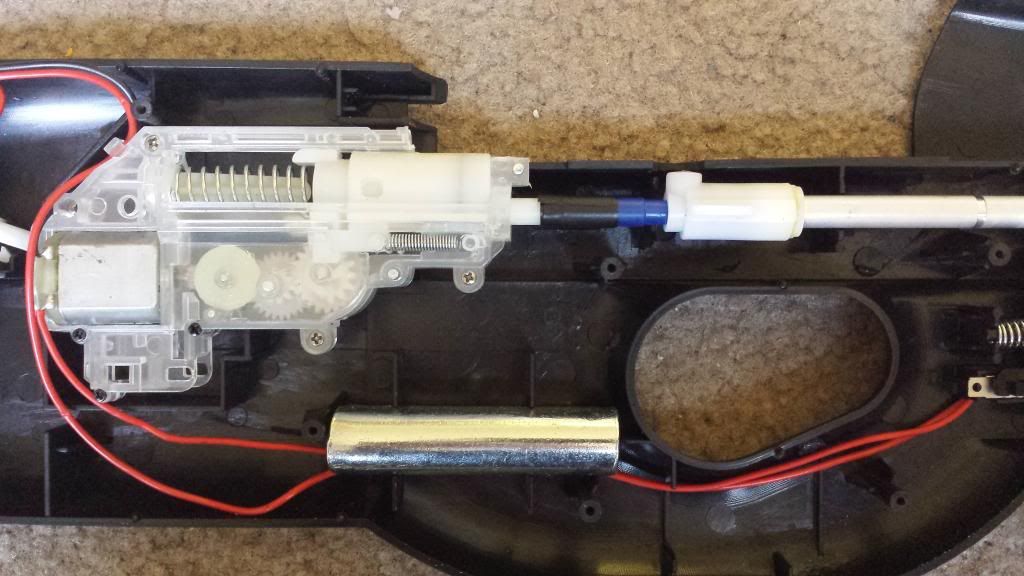
Now it was time to begin the re-assemble, I wrapped a piece of electrical tape around the seam to reinforce the graft & placed the gearbox back in the gun
here's a close up of the newly augmented gearbox
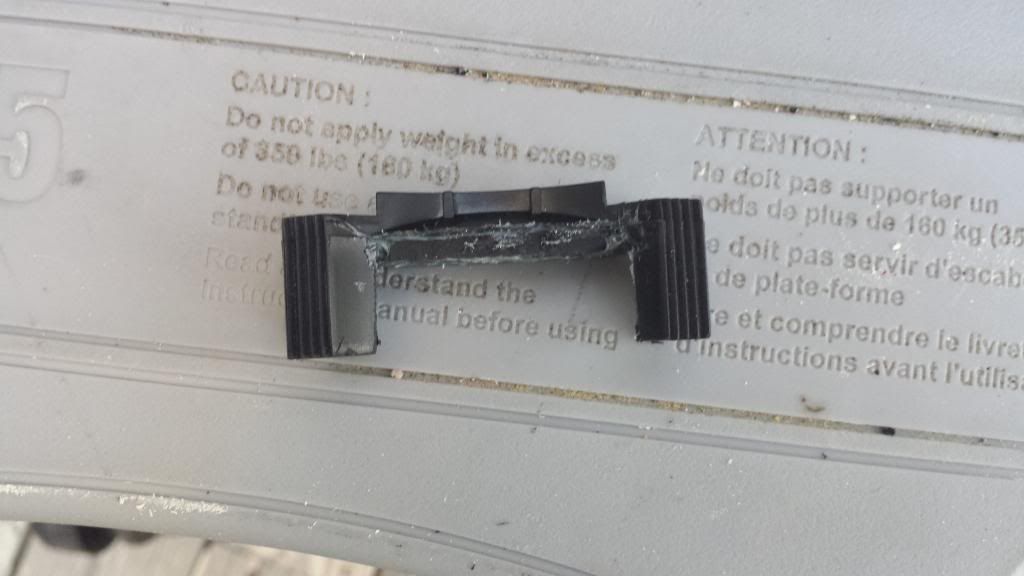
once I goteverything nestled back in place & all the screws tightened down, I had just a couple minor thing left to do. I had to graft on a block that would push the BB release on the TM mag & allow the BBs to feed properly.
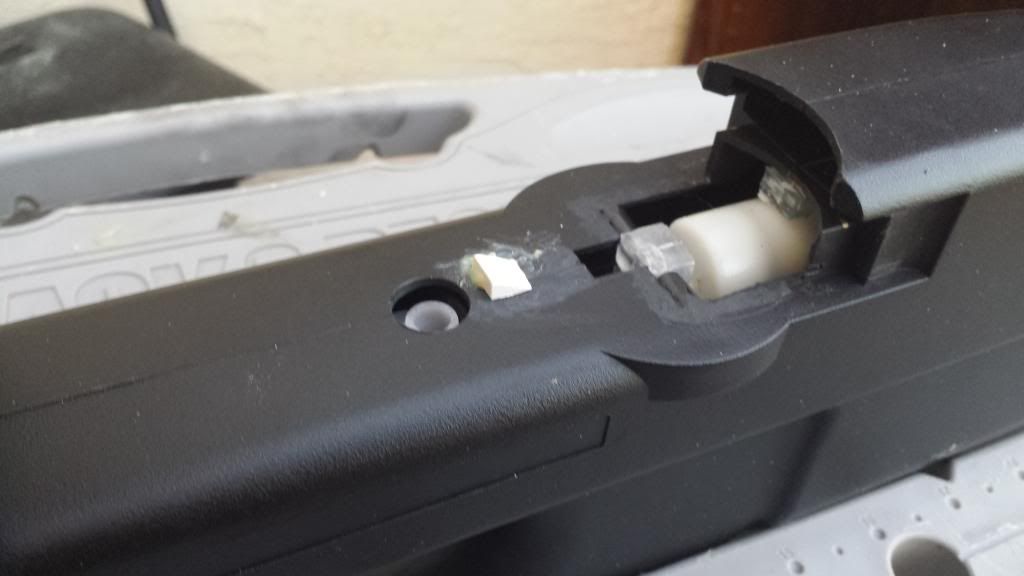
*note* here you can see how I cut the mag block off the gun. I didn't cut all of the block off as you can see, just enough for the mag to seat properly on the gun.
The last thing I did was to bulk up the magazine catch by adding a piece of 1/8in ABS under the original catch, this was done in order to keep the magazine in place & allow for the new block to release the BBs
a quick video to show off the fruits of my labor...
http://youtu.be/ZJi9P-t7C1Q
Well there ya have it, this was actually a surprisingly easy modification once I got the actual process sorted. I hope that this tutorial helps you guys out in modding your Well p90 to give it a more screen accurate look & have it remain functional. Again, if you have any questions on my process & steps please feel free to ask me.
...& away we go...
Parts list:
- Wellfire p90 (either model)
- Papermate ball point pen (or one that has a tapered end)
- 1x1 slanted Lego roof piece
- Scrap piece of 1/8in thick piece of plastic (I recomend ABS as it's much stronger than Sintra)
- Devcon Plastic Welder (make sure to use this stuff in a WELL ventilated area...or it will melt your brain)
- Medium Phillips screwdriver
The first thing I did was to open the gun to make it easier to cut the mag block off the gun (the part that sits back by the magazine catch) & to make a hole for the TM mags feed tube to sit in (did this part by using the tutorial found on this site). Unfortunately, cutting off the mag block leaves the gear box exposed, but once the mods are done the mag covers the open area so you won't see the hole.
-Gun open with mag block cut off & new feed tube hole cut

In order for the mag to seat on the gun properly you're going to have to cut a small part of the gearbox's frame off (don't worry this doesn't affect function). Even with the piece of the gearbox frame cut off, the gearbox itself sticks up above the hole you made but it isn't very much & all you need to do is grind a portion of the mag's lip down flush (a 1/2in wide section oughta do it).
Still with me? Good, on we go...
With the new feed tube hole cut I had to relocate the barrel slightly forward of it's original postion (seen below)
- Original postion

- New position

As you can see, there was now a gap between the end of the barrel & the gearbox (no bueno). I now had to figure out how to fill that gap, after trying a couple diameters of tubing I had laying around the house I decided to try a simple papermate pen...

I cut a small piece off the bottom end of the pen where it tapers down smaller than the rest of the body of the pen & snipped off the end so I now had a tube that air would travel thru easily

I then grafted the piece of pen to the gearbox like so...

*note* in this picture you can see where the small bit of gearbox frame was cut off from the top right-hand corner of the frame.
Now it was time to begin the re-assemble, I wrapped a piece of electrical tape around the seam to reinforce the graft & placed the gearbox back in the gun

here's a close up of the newly augmented gearbox

once I goteverything nestled back in place & all the screws tightened down, I had just a couple minor thing left to do. I had to graft on a block that would push the BB release on the TM mag & allow the BBs to feed properly.

*note* here you can see how I cut the mag block off the gun. I didn't cut all of the block off as you can see, just enough for the mag to seat properly on the gun.
The last thing I did was to bulk up the magazine catch by adding a piece of 1/8in ABS under the original catch, this was done in order to keep the magazine in place & allow for the new block to release the BBs

a quick video to show off the fruits of my labor...
http://youtu.be/ZJi9P-t7C1Q
Well there ya have it, this was actually a surprisingly easy modification once I got the actual process sorted. I hope that this tutorial helps you guys out in modding your Well p90 to give it a more screen accurate look & have it remain functional. Again, if you have any questions on my process & steps please feel free to ask me.